Bulk Upload Users via .CSV file v2
Bulk uploading users will allow you to create and update user details by importing them into the platform via a .CSV file
Prepare a .CSV file ready for upload.
.CSV Template is available for download.

NOTES
- The upload users file has fields separated by a comma (or other delimiter) ONLY - no space. The first line contains the valid field names. The rest of the lines (records) contain information about each user.
Fill out the .CSV file fields, if you would like to enrol users into courses and cohorts at the same time as their profiles are created within the system, you can add the appropriate courses and cohorts to the columns and rows which need this information.
The following fields are required and must be filled in the .CSV file.
- Username
- Email
- First Name
- Last Name
- Password
Please note, if no password column is included, then a welcome email is generated and sent to the user with their login details and a temporary password. If you include a password column, you will have to manually send the created password to the user.
- Username
- All email addresses must be lower case
- Avoid special characters in field information like quotes or other commas.
- Ensure there are no blank characters at the beginning or end of filled fields
Step 1. Select Users under Site Administration
Step 2. Select Accounts under Users to access Upload Users
Step 3. Select the .CSV file that you’ve prepared from your computer or drag the file into the drop zone.
Step 4. Select Upload Users
Step 5. Confirm that the information viewable in the preview is correct.

TIP: We strongly recommend that you test a file that contains fields you proposed to use with one user before attempting a file upload for the first time.
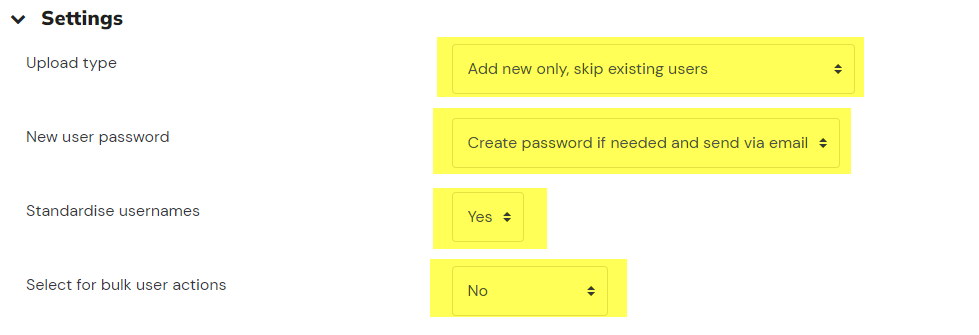
Step 6. Configure the settings for this upload.
|
Upload Type
|
|
|
|
New user password
|
|
This field is locked unless Add new and update existing users or Update existing users only are selected as Upload type. |
|
Standardise usernames
|
|
|
|
Select for bulk user actions
|
|
|
Step 7. Click upload users to save.
Step 8. Scroll down to the bottom of the page, past all the user details. Check that all of the uploaded users have been loaded correctly and there are no errors.
Step 9. Select Continue
You’re users have now been created and enrolled into any cohorts and courses required in the spreadsheet. You will be taken back to the bulk upload users page.
Related Articles
Bulk Suspend Users via .CSV file
You need Admin access to be able to perform this action. This guide shows how to suspend multiple users from the site. Use .CSV files to make changes to a large number of users. Create a .CSV File containing the users you wish to suspend. Sign in to ...Bulk Upload Users to Courses and Groups via .CSV file v2
You need Admin access to be able to perform this action, Bulk updating users information via .CSV file will allow you to update and enrol user/s to course/s and add them to group/s within a course. This tutorial will help you do this step by step: ...How to Setup a File Resource v2
Overview A file resource allows administrators to upload important documents and media with students in a structured and accessible way. Common file types include PDFs, Word documents, presentations, images, and videos. This resource type is ideal ...Bulk Upload Users to a Cohort v2
You need LMS Admin access to be able to perform this action, Bulk uploading users to cohort via .CSV file will allow you to add multiple users to one or more cohorts. This tutorial will help you do this step by step: Important: We strongly recommend ...How to Bulk Upload Cohorts v2
You need Admin access to be able to perform this action. An administrator can upload multiple cohorts from a CSV (comma separated values) formatted text file in Site administration > Users > Cohorts > Upload cohorts. Cohorts can be created in both ...