How to Add and Manage a Calendar Event v2
 Note: Creation of some events require an Admin or Manager access.
Adding a Calendar Event
1. After logging in, click the Dashboard on the menu bar, scroll down and go to Calendar, click 'New Event'
2. On a New Event page select the type of event
Note: You can also add event by clicking into an empty space in the desired day in the calendar. Moreover, adding closing dates to course activities — assignments, quizzes etc. will cause them to show up in the calendar block as course events.
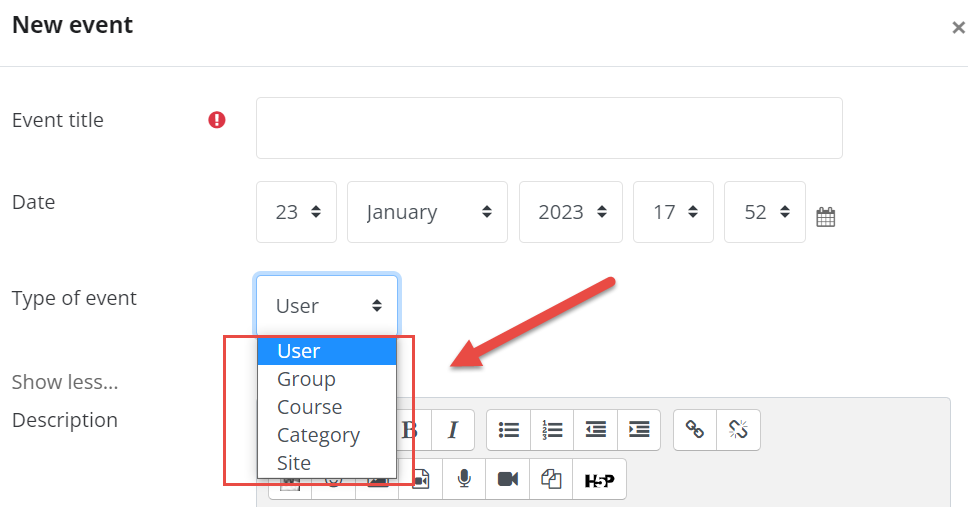
- A User Event will only be visible by the user currently logged in (i.e. the one creating the event)
- A Group Event will be visible to a particular Group on the course (chosen from a drop-down list). Group events will display a group icon in the calendar block and in the event page, the name of the group will be visible next to the event title.
- A Course Event will be visible to participants on the course. Only users with the capability to manage calendar entries at the course level can add course events.
- A Category Event will be visible to participants on the category. Only user with the capability to manage calendar entries at the category level can add category events.
- A Site Event is a "global" event - visible in every course and on the calendar on the home page. Only users with the capability to manage calendar entries at the system level can add site events.
3. When you click on Show More, you will be able to set the Description, Location, Duration and if you want an event to be repeated weekly.
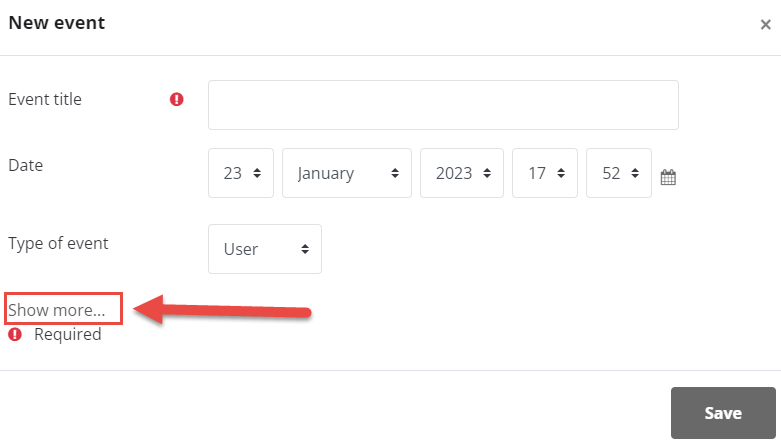
4. Click 'Save' when done.
Managing the Calendar
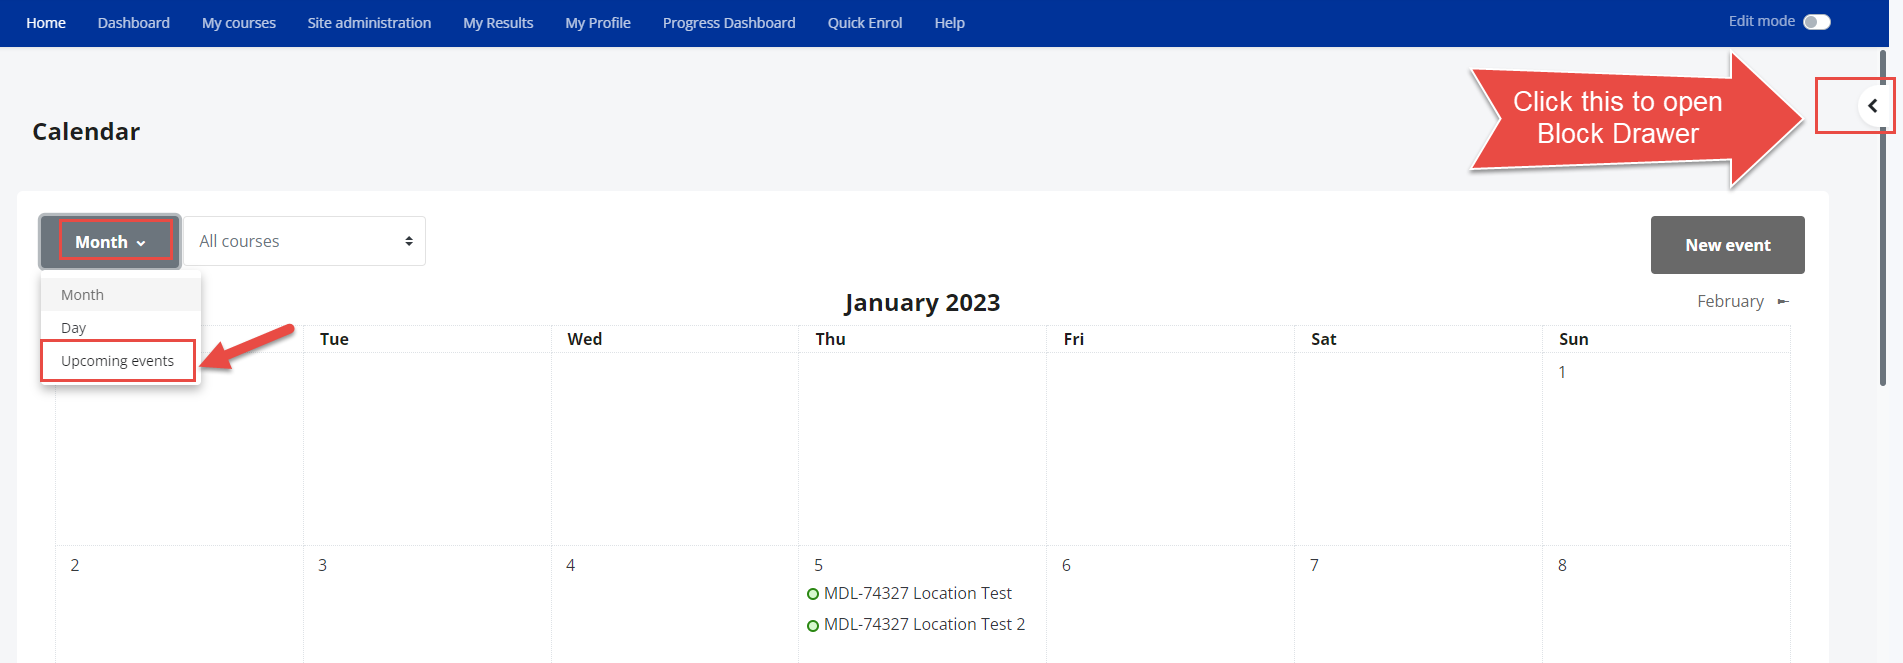
1. Upcoming Events View
You can choose to show the upcoming events of all courses or choose to view only a specific course you have access to. Click on the 'Full Calendar' link at the bottom part of the Calendar from your Dashboard.
2. Hide or Unhide Event Category
The different types of events can be visually filtered. You may choose Upcoming Events in the dropdown. Then open the 'Block Drawer' at the right side.
For example, if you (as a teacher) wanted to hide Group event dates (events assigned to learner Groups you create), click "Group events" on the block drawer. This would hide all group events, and the color code would disappear from the link on the calendar. To show the events again, click the Group Events link again. This can make the calendar easier to read (especially if there are many events on the calendar).
Related Articles
How to Add and Move a Block
Overview Blocks are items which may be added to the side inside the block drawer of any page in Moodle. Different themes allow blocks to be added to the left, right or both sides. They may also be added to the centre of the Dashboard. NOTE: You need ...How to Add Quiz Questions
Overview Adding questions to a quiz activity is a vital step in creating effective quiz assessments in the Learning Management System (LMS). In this tutorial, we’ll guide you through the step-by-step process of adding questions to a quiz activity, ...How to Add Reengagement Activity
Reengagement activity provides a way for you to remind students to return to the course and complete activities. You can also use this plugin to selectively release timed content in a course. Note: User experience for teachers using this plugin is ...How to Add a Course Category v2
Overview In Learning Management System (LMS), course categories are used to organise courses into a clear and structured hierarchy. They help administrators, teachers, and learners easily find, manage, and navigate courses, ensuring a more efficient ...How to Add a SCORM Package
Note: You need Editing Teacher or Manager access before you can perform this action. What is SCORM? SCORM, which stands for Shareable Content Object Reference Model, is a set of technical standards for eLearning software. SCORM tells programmers how ...