How to Assign Users to a Group v2

Note: You need Teacher or Manager access before you can perform this action.

Go to How to Create a Group, if you want to learn more about group creation within a course.
Below are the steps to assign users to an existing group within a course,
Step 1. Enter the course where you want to add the users to an existing group.
Step 2. Click on the 'Participants' on the course menu bar.

Step 3. Select the Groups in the dropdown option of Enrolled Users.
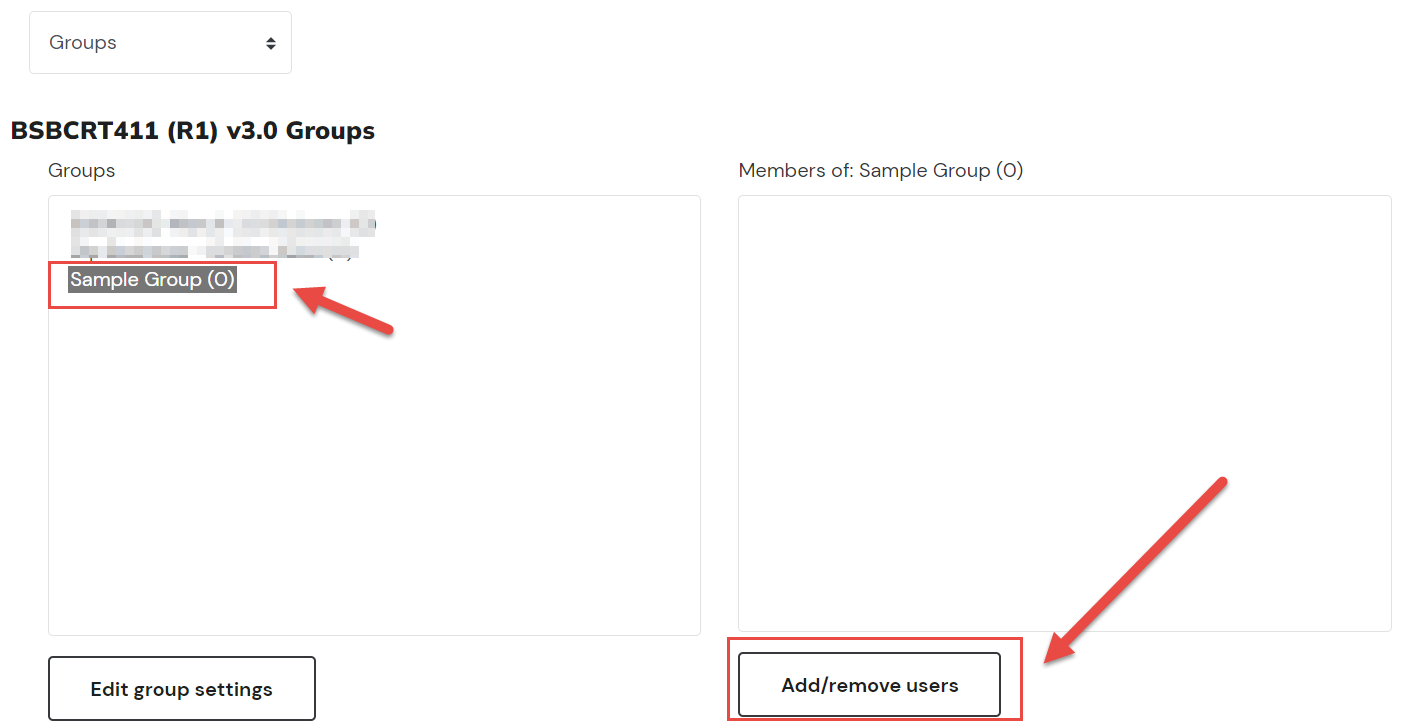
Step 4. From the existing list of groups, select the group that you’d like to add users to.
If you need to create a new group, follow the instructions on How to Create a Group before proceeding to the next steps.
Step 5. Select Add/remove users
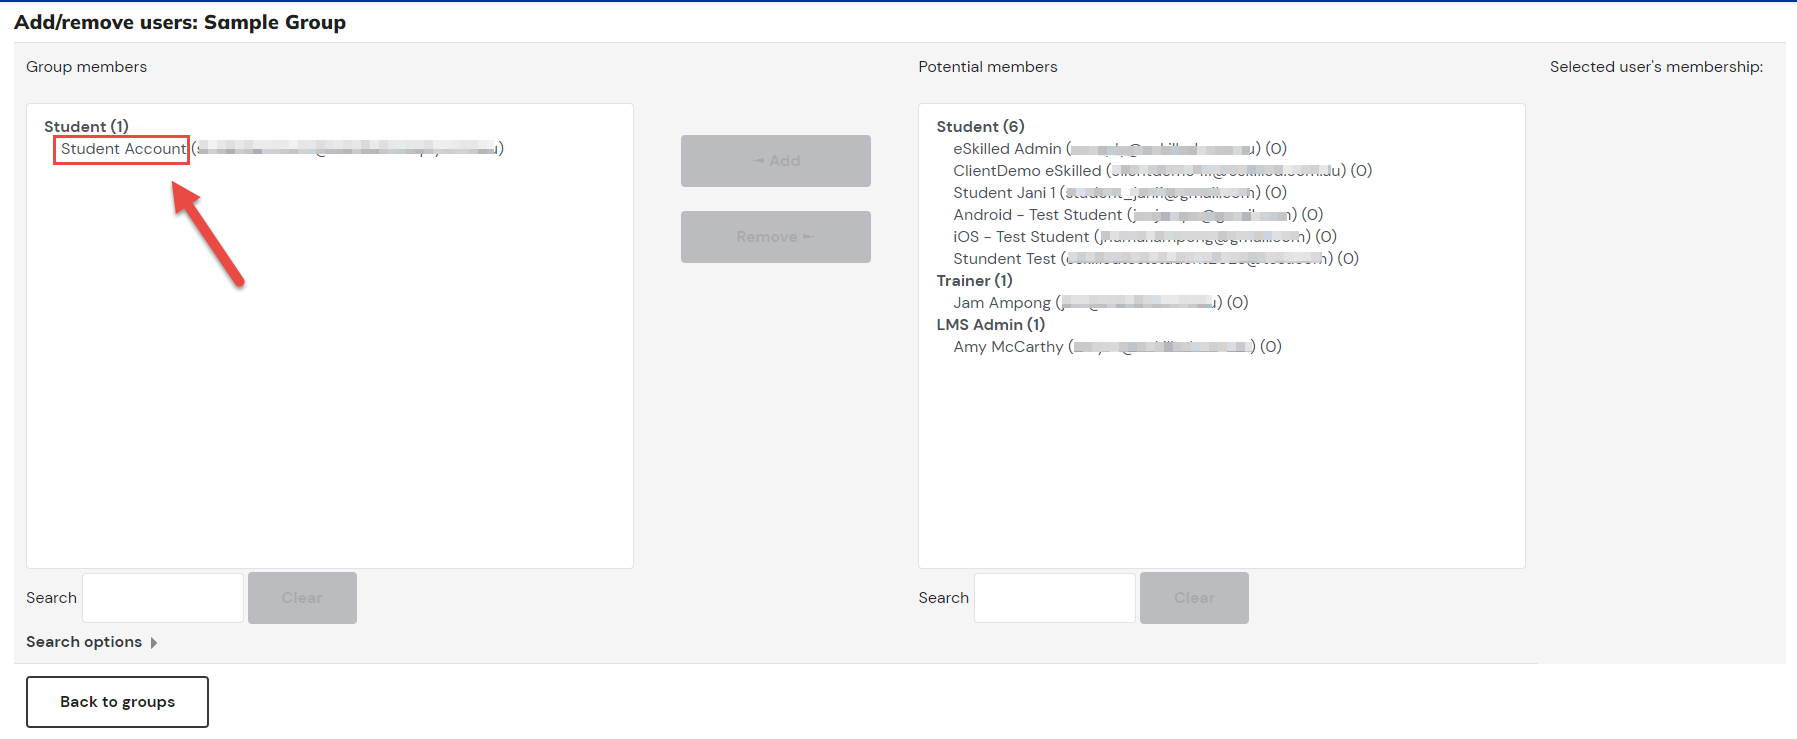
Step 6. From the Potential members list, select the users you wish to add to the group.
Tips: You can select multiple users by holding the Ctrl key on your keyboard while clicking on user/s.
You can also search for a specific user to add by typing in the name or e-mail address of the user on the Search bar.
Selected users will now be added to the group.
If you wish to activate the group mode and force it in the settings, you may proceed to the Course Settings:
The Group mode setting has 3 options:
- No groups
- Separate groups - Each group member can only see their own group, others are invisible
- Visible groups - Each group member works in their own group, but can also see other groups. The group mode defined at course level is the default mode for all activities within the course. Each activity that supports groups can also define its own group mode, though if the group mode is forced at course level, the group mode setting for each activity isignored.
Related Articles
Create a New Cohort and Assign Users to a Cohort v2
You need Admin access to be able to perform this action. Cohorts are site-wide or course category-wide groups. The purpose of cohorts is to enable all members of the cohort to be easily enrolled in a course. This can be done using Cohort sync, which, ...How to Create a Cohort for a Qualification Using Categories and Assign Users to a Category Cohort v2
Note: You need an Admin or a Manager access before you can perform this action. In this tutorial we will be looking at how to create category cohorts and assign users. This assumed that you have created a category for your units. If you haven't done ...How to Enrol/Unenrol Users in a Course v2
All course participants are enrolled in the course and assigned an appropriate role. Enrolled users: Can be assigned to groups Have grades Can submit assignments Are visible in the list of participants Can subscribe to forums Can participate in ...Assign User Roles to Cohort (Assign a Cohort Manager v1)
You need Admin access to be able to perform this action. An administrator can upload multiple cohorts from a CSV (comma separated values) formatted text file in Administration > Site administration > Users > Accounts > Cohorts > Upload cohorts. ...Bulk Upload Users to Courses and Groups via .CSV file v2
You need Admin access to be able to perform this action, Bulk updating users information via .CSV file will allow you to update and enrol user/s to course/s and add them to group/s within a course. This tutorial will help you do this step by step: ...