How to Setup a BigBlueButtonBN Activity v3
How to Setup a BigBlueButtonBN Activity
 Note: You need Teacher or Manager access before you can perform this action.
BigBlueButtonBN lets you create from within Moodle links to real-time on-line classrooms using BigBlueButton, an open-source web conferencing system for distance education.
Using BigBlueButtonBN you can specify for the title, description, calendar entry (which gives a date range for joining the session), groups, and details about the recording of the online session.
With this plugin you can:
• Create links in any class to a BigBlueButton session
• Specify join open/close dates that will appear in the Moodle calendar
• Create a custom welcome messages that appears in the chat window when users join the session
• Launch BigBlueButton in its own window
• Restrict students from entering the session until a teacher joins
• Monitor the active sessions for the course and end any session (eject all users)
Step 1: To start making changes on your course page, toggle 'Edit mode'.
Step 2: Select a course and click on Add an activity or resource.
Step 3: Choose  from the activity or resource list.
Step 4: Select an Instance type.
Instance type | There are three instances available: • Room/Activity with recordings • Room/Activity only • Recordings only |
Step 5: Fill out the information needed and adjust the settings for the BigBlueButtonBN.
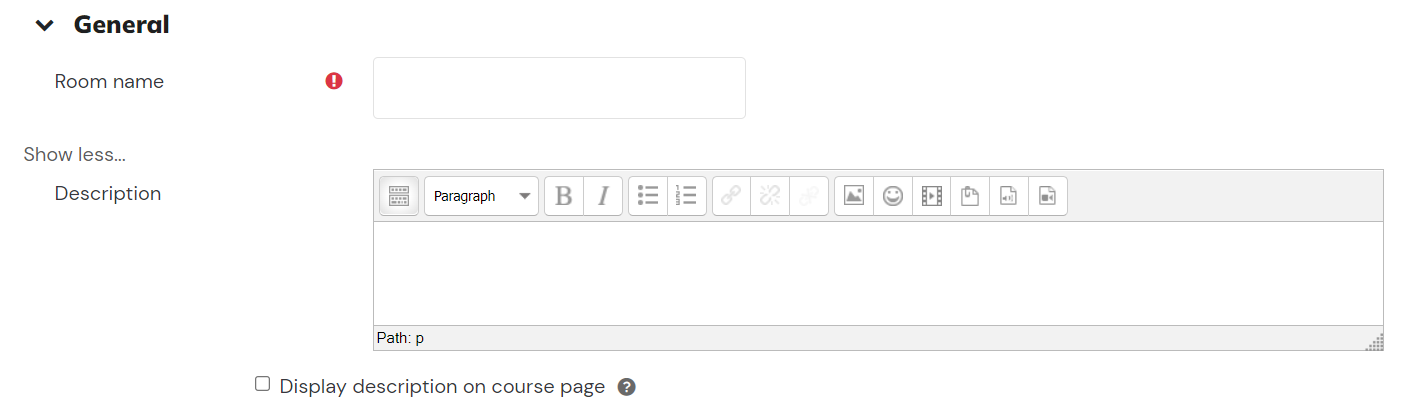
Room name* | (Mandatory field) enter the name of the BigBlueButtonBN activity in the Room name text box. |
Description | Enter a relevant description in the “Description” text area that describes the BigBlueButton if needed. |
Display description on course page | (checkbox) If enabled, the description of this activity will be shown to the course page. |
Welcome message | Enter a welcome message that would greet the students for this activity |
Wait for moderator | Enable this option if you need the participants to wait for the instructor before beginning the activity |
| The session may be recorded | Enable this option if you need the session to be recorded. |
| Lock Settings | You can disable/enable the following options for your BigBlueButton activity: ☐ Disable webcams ☐ Disable microphones ☐ Disable private chat ☐ Disable public chat ☐ Disable shared notes |
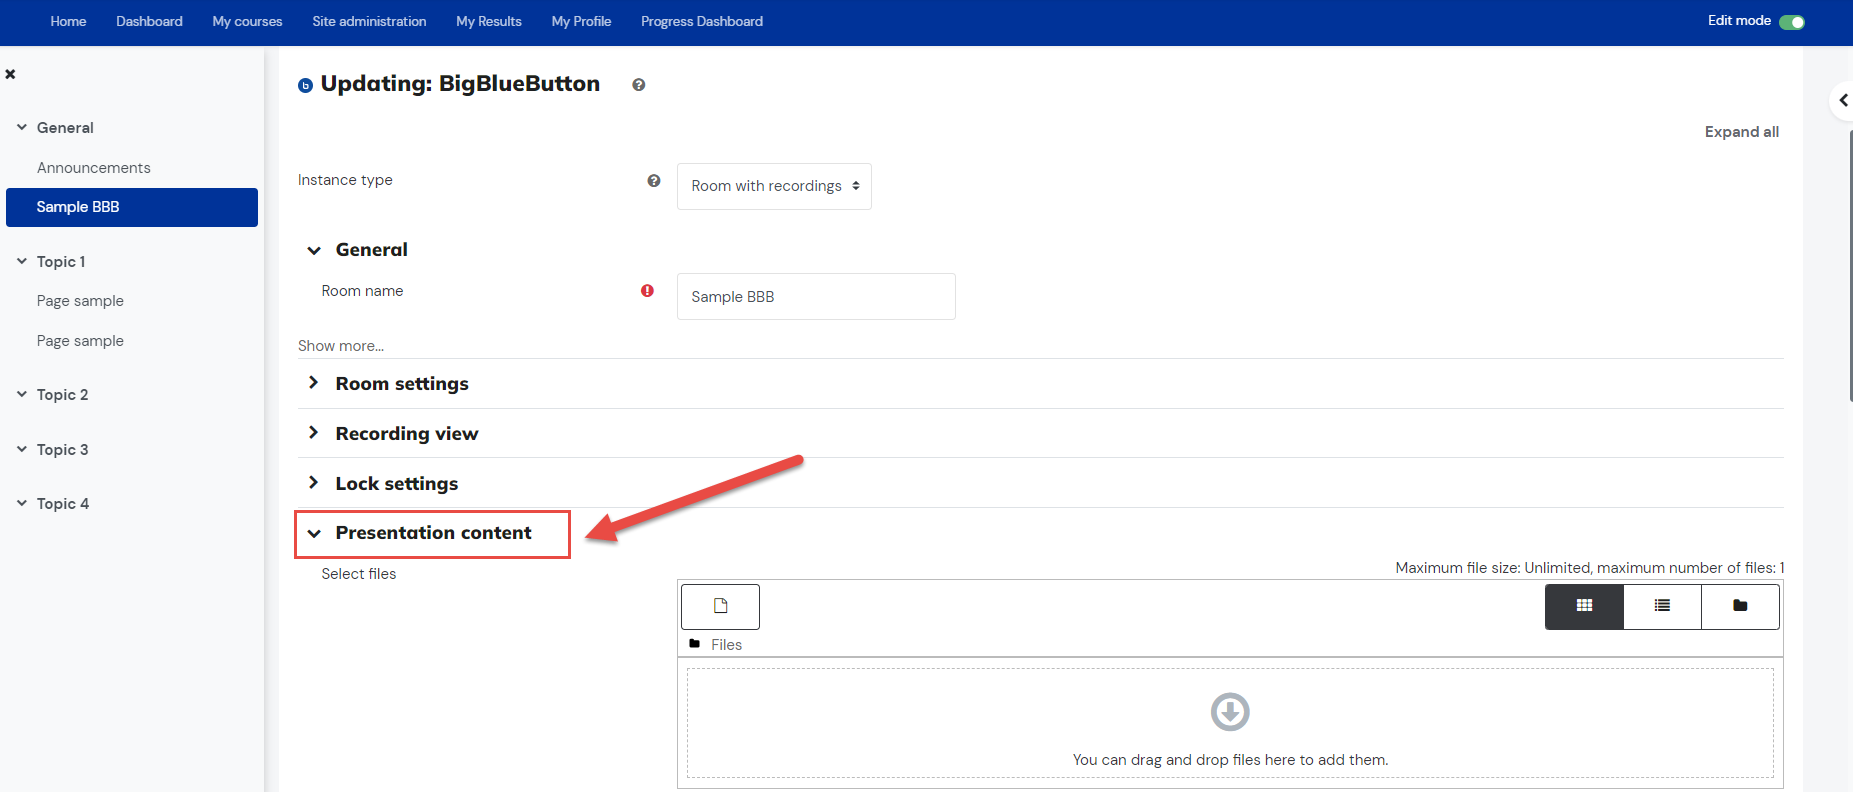
| Presentation Content | See "How to Setup a Pre-uploaded Presentation to BigBlueButtonBN Activity" tutorial below for more information. |
Add participant | There are three options available: •All users enrolled •Role •User Once an option has been selected (eg Role), you can then make another selection from the drop down menu (eg Moderator) and then select the Add button. |
Participant list | The Participant list displays all users selected by the Add button. The option for each user may be interchanged from Viewer to Moderator to Viewer depending on the role to be given. |
When configuring a BBB meeting to allow Trainers, Managers, and LMS Admin Users to join with moderator permissions, you will need to set it up accordingly.
1. By Role: Select a role from the first drop-down box, then choose the role that should join the meeting as a moderator.Then, once the role and role type are selected, ensure the "Join Session As" permission is set to the moderator option.2. By User: Select "User" from the first drop-down box.Select the specific user who should join the session with moderator permissions, then click "Add."Once added to the list, ensure their "Join Session As" permission is set to "Moderator."
Step 6: Once everything is set, click Save and return to course.
The BigBlueButtonBN activity that has been created will now be displayed in the section where you selected ‘Add an activity or resource’.
How to Setup a Pre-uploaded Presentation to BigBlueButtonBN Activity
Step 1: On the course where you have added the BigBlueButtonBN Activity, make sure that you toggle on the "Edit mode" button to start making changes on your course:
Step 2: On your created BigBlueButtonBN Activity, select the 'Settings' to make changes in the setup.
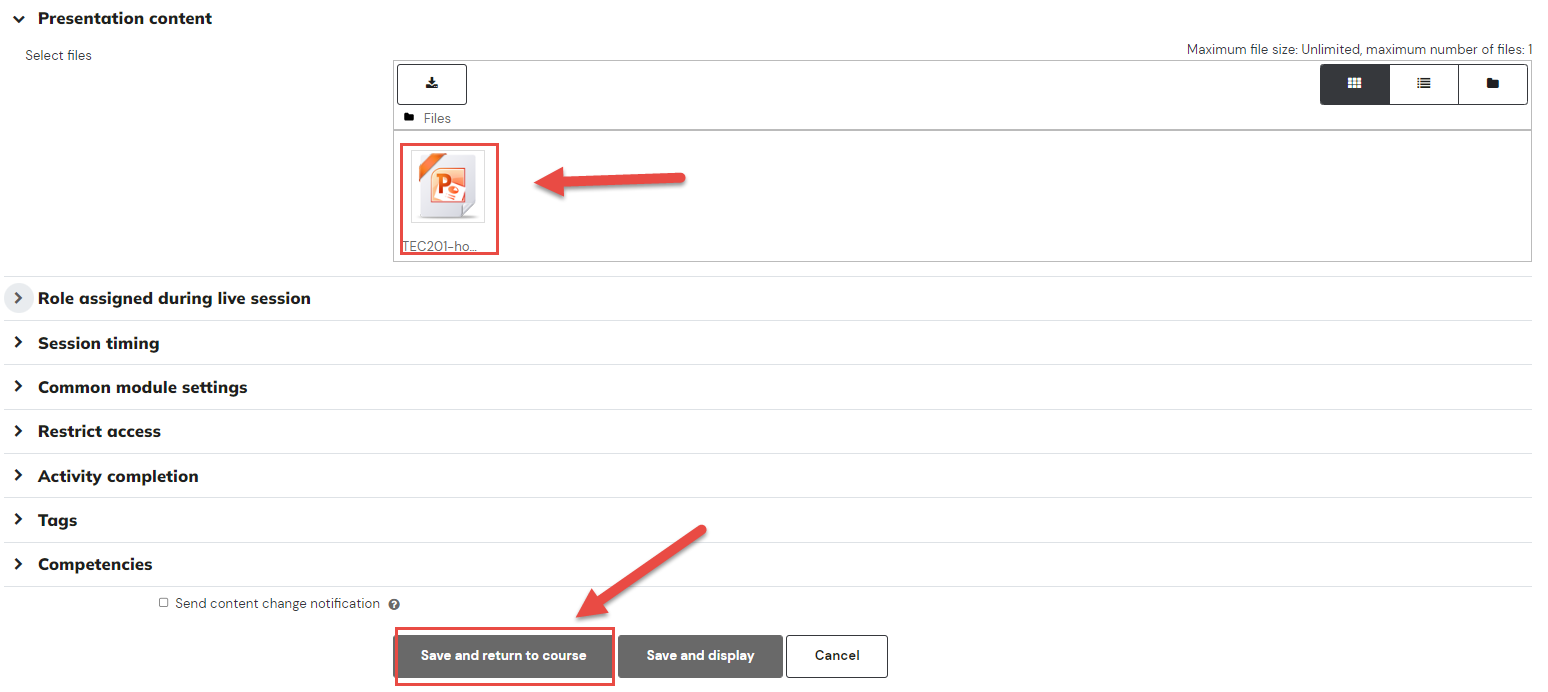
Step 3: Go to the 'Presentation Content' section and from here, you can either: 1. drag and drop your pre-uploaded presentation or 2. click on the file  icon to select file from your local PC.
Step 4: Once the presentation was successfully uploaded, scroll down until you see the 'Save and Display' option, click it to save your changes.
Step 5: After joining the session you will now see the pre-uploaded presentation on your BigBlueButtonBN Activity.
Open | If 'Enabled', users are able to join a meeting on the specified open date and time. |
Close | If 'Enabled', users are no longer able to join a meeting on the specified open date and time. |
| Availability | The availability option permits students to view and access assignments and resources, there are two options available: • Show on course page • Hide from students |
| ID number | The ID number can be entered to reference the same ID number from a third-party package especially gradebook. Otherwise, the field may be left blank. |
| Force language | The options you can use are 'Do not Force' and English (en) (This is used mainly in the translations. |
Group mode | There are three group settings available: • No groups • Separate groups • Visible groups |
| Grouping | Not available if no group mode is selected, if separate or visible grouping is enabled, you will then be given an option to Add group/grouping access restrictions. |
Teachers may restrict students from accessing assignments and resources based upon a set of conditions. These conditions may be based on whether an activity has been completed or not, date restrictions when assignments can commence, a specified grade to be achieved, a certain user profile or a set of nested restrictions based on the above settings.
Restrictions can be one, two or all of the following criterion:
| Completion tracking | There are three options available: • Do not indicate activity completion • Students can manually mark the activity as completed • Show activity as complete when conditions are met |
| Require View | (checkboxes) Two criteria available, either or both can be ticked. • Student must view this activity to complete it • View as completed if the feedback is submitted |
| Expect completed on | This setting specifies the date when the activity is expected to be completed. |
| Tags | Tags will allow students and teachers to connect to other courses and content being offered. |
Competencies will not be available unless they have been set up at a course level. Administrators can set up competency frameworks and add competencies within the framework. Teachers can also add competencies to courses and course activities.
| Course competencies | Course competencies allow you to search for competencies that you’d like to link to your existing activity. |
| Upon activity completion | There are four options to select once an assignment has been completed: • Do nothing • Attach evidence • Send for review • Complete the competency |
Send content change notification | Tick the box to notify course participants about this new change activity or resource. Only users who can access the activity or resource will receive the notification. |
Related Articles
How to Download Video Recording from BigBlueButtonBN Activity v2
Notes: You need Teacher or Manager access before you can perform this action. BigBlueButton Moderators has the option to download their video recording after a BigBlueButton session/meeting. You can learn more on how to to setup a BigBlueButton ...How to Setup a Checklist Activity
Note: You need Teacher or Manager access before you can perform this action. The checklist module allows a teacher to create a checklist/todo list/task list for their students to work through. How to Add a Checklist Activity To create a Checklist ...How to Setup Proctoring for Quiz Activity
Overview Proctoring ensures secure monitoring during activities like exams or assessments, maintaining fairness and integrity. It involves overseeing participants to prevent cheating or malpractice, using device’s camera for remote monitoring. Step ...How to Setup an Interactive Activity v2
Note: You need Teacher or Manager access before you can perform this action. The H5P activity module enables you to create interactive content such as Interactive Videos, Question Sets, Drag and Drop Questions, Multi-Choice Questions, Presentations ...How to Setup and Generate Activity Completion Report v2
Note: You need a Manager access before you can perform this action. Activity completion or completion tracking, lets students see their progress through their Moodle course through the use of checkboxes on the side of activities. Teachers can also ...