Bulk Upload Users to Courses and Groups via .CSV file v2

You need Admin access to be able to perform this action,
Bulk updating users information via .CSV file will allow you to update and enrol user/s to course/s and add them to group/s within a course.
This tutorial will help you do this step by step:

Important:
We strongly recommend to create users to your system first before enrolling them to courses in bulk, you may refer to the following tutorials to learn more on how to add users to your system:
Create a New User
Create a New User
Download the template below to start enroling the students to Course and add them to Groups in bulk action.
Prepare a .CSV file ready for upload.
Bulk Course and Group Enrolment Template.csv is available for download.

NOTE :
The upload users file has fields separated by a comma (or other delimiter) ONLY - no space. The first line contains the valid field names. The rest of the lines (records) contain information about each user.
How to Select, Download, and Update User Information From the System to .csv File
Step 1: From the Home Page, Login using your Admin credentials.
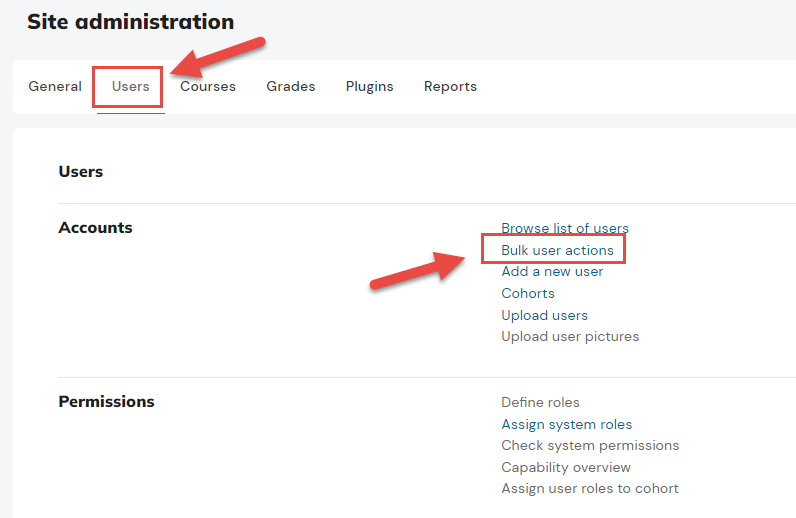
Step 2: Click the Site administration option on the menu bar.
Step 3: Select
Users then Bulk user actions
Step 4:
From the Users in list section, select the users you want to get the information for bulk enrolment then click the 'Add to selection' button.
Holding the Ctrl Key while selecting users will let you choose multiple users at a time.
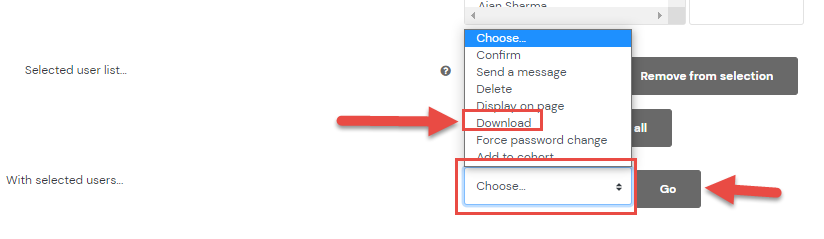
Step 5: Selected user will now appear on the right side, once you get all the users you need, from the
With selected user... drop down list choose
Download and click on the
Go button.
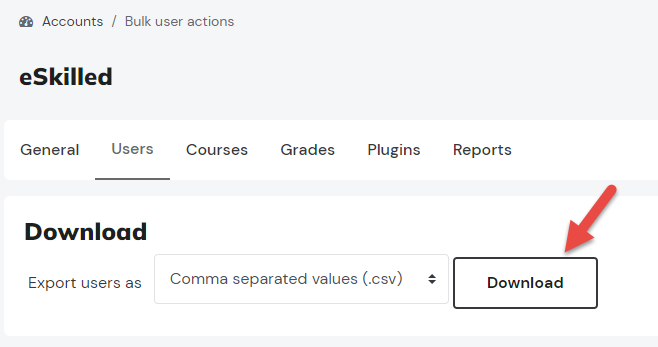
Step 6: Export users as "Comma separated values (.csv) and click on the Download button:
Step 7: Once the download is complete, open the downloaded file and copy the information from the first 3 columns and paste it to your downloaded Bulk Course and Group Enrolment Template.csv
Step 8: On your
Bulk Course and Group Enrolment Template.csv enter the 'Course Short Name' of the course where you want to enrol the students and exact 'Group Name' within the course if there's an existing group otherwise system will create a new group with the group name you have entered on your template:
|
course# (e.g column D and F on the template) - is the shortname of the course, if present the user will be enrolled in that course.
|
Do not use the fullname of the course or it will generate an error.
This field is the ONLY required field for a successful enrolment. All the others are optional.
Optional fields: add these keywords at the very top row of the template if needed,
|
group# (e.g column E and G on the template) - may be used to assign users to groups in course, using name or id (numeric group names are not supported). NOTE: if the group does not already exist, it will be created.
|
|
role# - may be used to specify roles directly, using either role short name or the role id (numeric names of roles are not supported). Usually you will use the role name that is the shortname of the role as defined in Users > Permissions > Define roles, eg. student, editingteacher. If the role column is left out, the users will be enroled in the course with the default role, which is normally student.
|
|
enroltimestart# - may be used to set the enrolment start time, for each course. If not explicitly set here, the enrolment start time is set to be today. To set a date: "YYYY-MM-DD" and to set a date and time "YYYY-MM-DD HH:MM"
|
|
enrolperiod# - may be used to set the enrolment duration, in days, for each course. If not explicitly set here, all the users will get the duration as set in the Manual enrolment method of the course (which defaults to 0 meaning unlimited.)
|
Step 9:
After all the necessary information was entered correctly, make sure to save the template in .csv format.
Your template is now ready to be uploaded to your system.
How to Upload .csv File to Enrol the Users
Step 1: From the Home Page, Login using your Admin credentials.
Step 2: Click the Site administration option on the menu bar.
Step 3: Select
Users then Upload users
Step 4:
From the Upload users section, upload your template by clicking the Choose a file... button and choosing your template from your local drive, once correct template is selected click on the 'Upload users' button.
Step 5: Uploaded template.csv will now show under the
Upload users preview, make sure to choose
Update existing users only from the
Upload type drop down list. if you are only enrolling existing users from your site, click '
Upload users' button to confirm and proceed, otherwise click Cancel and adjust your template file as needed.
Step 6: System will now show you the Upload users results, it will also provide a quick summary of the updated users and errors encountered (if there's any), to finish the process click the '
Continue' button.
Users are now enrolled to their respective courses and groups within each course they are enrolled to:
Users bulk enrolled to the course: (Course>Participants)
Users bulk added to the groups within the course: (Course>Participants>Groups)
Related Articles
Bulk Upload Users via .CSV file v2
Bulk uploading users will allow you to create and update user details by importing them into the platform via a .CSV file Prepare a .CSV file ready for upload. .CSV Template is available for download. NOTES The upload users file has fields separated ...Bulk Suspend Users via .CSV file
You need Admin access to be able to perform this action. This guide shows how to suspend multiple users from the site. Use .CSV files to make changes to a large number of users. Create a .CSV File containing the users you wish to suspend. Sign in to ...How to Setup a File Resource v2
Overview A file resource allows administrators to upload important documents and media with students in a structured and accessible way. Common file types include PDFs, Word documents, presentations, images, and videos. This resource type is ideal ...Bulk Upload Users to a Cohort v2
You need LMS Admin access to be able to perform this action, Bulk uploading users to cohort via .CSV file will allow you to add multiple users to one or more cohorts. This tutorial will help you do this step by step: Important: We strongly recommend ...How to Bulk Upload Cohorts v2
You need Admin access to be able to perform this action. An administrator can upload multiple cohorts from a CSV (comma separated values) formatted text file in Site administration > Users > Cohorts > Upload cohorts. Cohorts can be created in both ...